Archive
#Citrix blog post – Get Up To Speed On #XenDesktop Bandwidth Requirements
Welcome to the HDX bandwidth testing blog series! In the following posts I’ll be sharing key findings and results from an extensive round of XenDesktop 5.6 / XenApp 6.5 bandwidth testing. Already using XenDesktop 7? Well then stay tuned for the last post in the series where I will be discussing that as well. Before I begin, I want to take this opportunity to thank Andy Baker and Thomas Berger for their tremendous help and guidance in managing this effort.
Part 1: The Prologue
It is not uncommon these days to have great LAN networks with what seems like unlimited bandwidth. I find myself at the office running multiple virtual desktops, uploading my files to ShareFile, all while streaming Spotify to my machine at the same time without even noticing. Even at home you have a nice fast connection just for yourself. Unfortunately many users do not have this luxury due to expensive business grade connections which are often over utilized. Overlooking this fact during a deployment can result in frozen and disconnected sessions and an overall poor user experience. This leaves IT departments frequently asking “how much bandwidth do I need for XenDesktop?”
Of course the answer to this question – in my opinion more so than most questions – is it depends. Why is that? Because it depends on what is on the screen at any given time. The amount of bandwidth consumed will be close to none when the session is idle, but can vary greatly depending on whether a user is typing, browsing a document, running a slideshow, or watching a video. Of course there is always the magic number of 20-30kbps that has been around forever, but that was before the explosion in multimedia content both on the web and now seen more frequently in applications as well . (Although I would note that we did reach and beat that 20-30kbps zone with some of our less multimedia intensive tests).
To help better answer this question our team decided to start running some tests…..a lot of tests. We measured general daily usage, took a deep dive into single application tests, and put some optimizations and best practices to the test. In part one of this blog I will be discussing the infrastructure and methodology for our first round of testing.
Infrastructure
The tests that I will be discussing were run in the environment shown below. A laptop was connected to anApposite WAN Emulator and used as the endpoint for both the manual and Login VSI tests. The emulator was used to control the bandwidth limits for each scenario that I describe later on in this blog post. The other end of the emulator was connected to a switch that was configured to send all packets in and out of the emulator to a mirrored port monitored by a server running Wireshark. This ensured all communication between the client and virtual desktop were captured without interfering with the VSI scripts. The environment infrastructure and desktop pool were also connected to the switch and communicated transparently to the laptop.

The environment was built using the product versions shown below. This is important to note as future tests are planned with XenDesktop 7 which benefits from newer codecs and algorithms for rendering. These tests were also run with the latest version of Login VSI which features more intense workloads than previous versions and a large randomized content library.
- XenServer 6.1
- Microsoft Server 2008 R2
- Windows 7 x86
- XenDesktop 5.6
- VDA 5.6.2
- Receiver 3.4 Enterprise
- Login VSI 4.0
Disclaimers
Before I begin to explain the tests that we ran I need to make a few disclaimers. The first being that quality of service (QoS) was not…
Continue reading here!
//Richard
Login VSI 4.0 – #LoginVSI, #VDI, #Scalability, #BYOD – @LoginVSI
Login VSI 4.0 released!!
Wow, I can’t believe that my week was this busy… tooo bad though I must say thank you so much to the Login VSI team for giving me the privilege to test Login VSI 4.0 Pro prior to the release… but did I have the time? Nooooo…. 😦
But it’s gonna be one of the first things I do when I get some spare time over some night/weekend in the near future!!
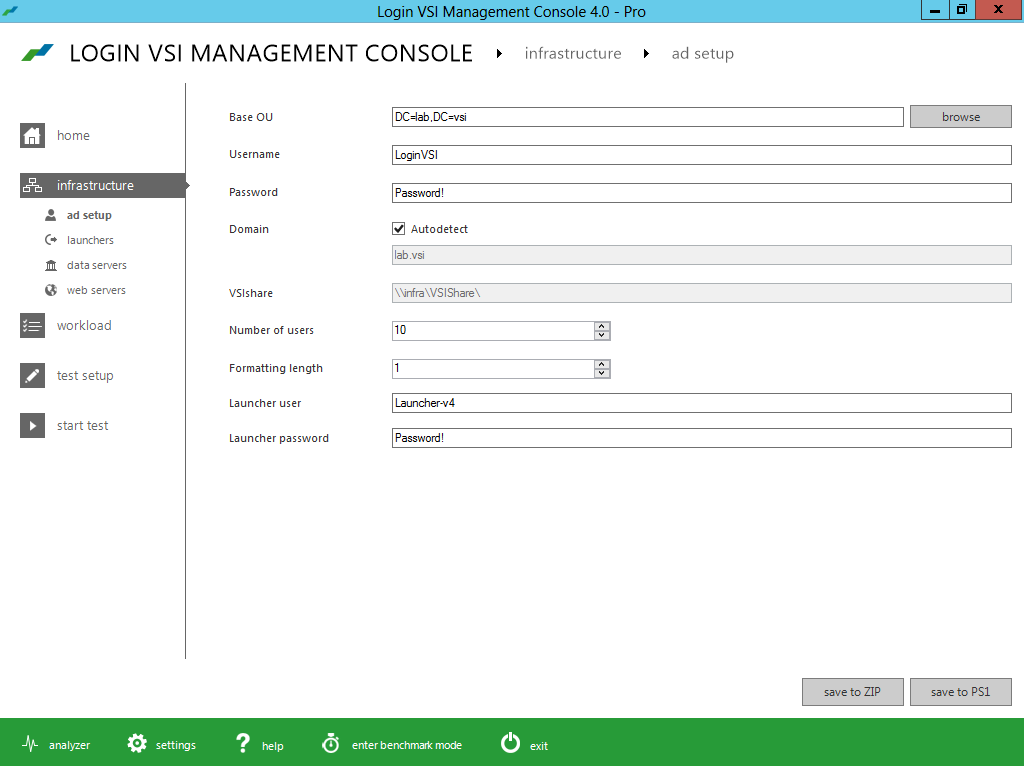
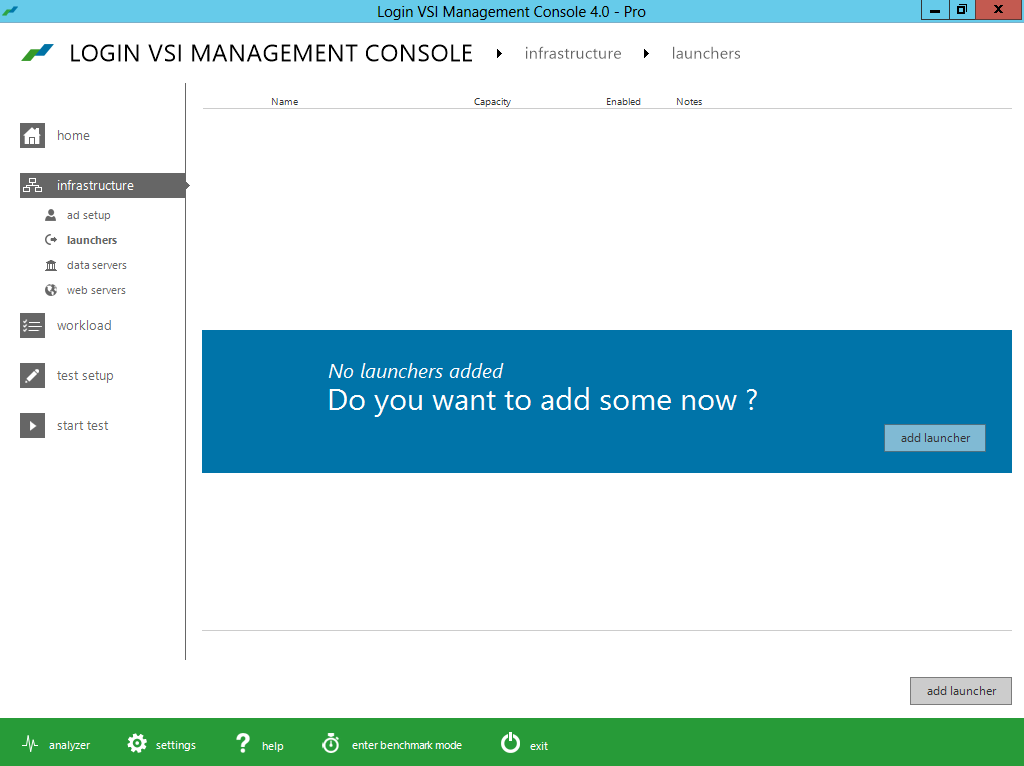
Below you find the press release and a bunch of pictures I got as a part of the “blogger preview” kit!
Improved ease of installation
- Minimized test image footprint
- Centralized management and updates
- Direct Desktop Launch Mode, saves on infrastructure
Improved ease of test creation
- New intuitive and workflow oriented UI
- New editor simplifies workload customization
- Benchmarking mode simplifies comparisons
Improved test realism
- More realistic user workload patterns
- More realistic dataset and data/file access
- Real-world test execution with multiple phases
Improved test insight
- New dashboard with real-time test feedback
- Enhanced VSImax accuracy
- Automated reporting of all relevant data


Delivering #Citrix #XenApp on #Hyper-V with PVS and #McAfee – via @TonySanchez_CTX
Good Citrix blog post from Tony Sanchez!
Architectures—whether physical or virtual—should be flexible enough to adapt to different workloads, allowing them to support changing business needs. Although implementing a new IT architecture takes time and careful planning, the process to test and validate an architecture should be easy. In the case of a virtual desktop architecture, test engineers should be able to follow a repeatable pattern, step by step, simply changing out the workload to validate the architecture under different anticipated user densities, application workloads, and configuration assumptions. The procedure should be as easy as learning a new series of dance steps (think PSY’s Gangnam Style, the most watched dance video on YouTube). The point causes me as a test engineer to ask the question: in the case of VDI, why can’t a hypervisor simply learn a new workload just like I might learn a new sequence of dance steps?
Luckily for test engineers, Citrix FlexCast® provides the ability to learn and deliver any workload type by leveraging the power of the Citrix Provisioning Services® (PVS). Recently I worked with engineers from Citrix and Dell, collaborating to build a FlexCast reference architecture for deploying XenApp® and XenDesktop® on Hyper-V on a Dell infrastructure. Testing of this reference architecture looked at how XenApp and XenDesktop performed under various workloads, altering hypervisor configuration settings and examining the overall user experience and user densities. At the drop of dime, FlexCast and PVS enabled a simple switch of the architecture to a new workload.
Based on that reference architecture effort, we recently began a Single Server Scalability (SSS) test using the latest hardware and software releases available. This blog focuses on that effort — what I call the “XenApp dance step for FlexCast style” and how XenApp workloads perform on Hyper-V. (A follow-on blog article will focus on an alternate “dance” sequence for XenDesktop.) The focus of this blog is how the configuration of the McAfee virus scanning software can impact performance and scaling.
In previous blogs, I describe the testing process and methodology that leverages the Login VSI test harness, along with key tips for success. Since those same methods and recommendations apply here, let’s review the configurations we used for this scalability testing as well as the workloads and actual test results.
For background reading, I highly recommend that you review Frank Anderson’s post on XenApp physical versus virtual testing results with Hyper-V. Frank is my colleague and a great resource for insights about testing, including implementation tips and general best practices. In addition, the related Dell and Citrix white paper describing the FlexCast reference architecture for deploying XenApp and XenDesktop on Hyper-V is available here.
Continue reading here!
//Richard


