How to: Create Desktop Appliance site on StoreFront – #Citrix, #StoreFront, #ThinClient
I guess that some of you out there by now are using Thin Clients and some are using Desktop Appliance site functionality in the old Web Interface for these thin clients that are XenApp- or XenDesktop-ready.
So now you have or are thinking on how to setup this on StoreFront!
Citrix has A LOT of work to do in order to ensure that StoreFront becomes a stable and enterprise ready! There are so many tweaks and configurations needed in config files etc. that just isn’t ok! Add them into the console! It’s not hard, even I could code in some menus, forms windows and trigger the underlying PowerShell scripts!
But back to the topic, how do we configure Desktop Appliance site in StoreFront? Well, first we need to have a look at the following edocs articles that explain how to do it:
Desktop Appliance sites – And the most important in this article is the bottom that details WHAT DOESN’T WORK!
Important considerations
Desktop Appliance sites are intended for local users on the internal network accessing desktops from non-domain-joined desktop appliances. When you decide whether to use Desktop Appliance sites to provide users with access to your stores, consider the following restrictions.
- If you plan to deploy domain-joined desktop appliances and repurposed PCs, do not configure them to access stores through Desktop Appliance sites. Instead, configure Citrix Receiver with the XenApp Services URL for the store. For more information, see XenApp Services URLs.
- Desktop Appliance sites do not support connections from remote users outside the corporate network. Users logging on to NetScaler Gateway cannot access Desktop Appliance sites.
How do you release this and don’t support connecting through a NetScaler Gateway? Then you miss the whole point of SmartAccess, you cannot trigger EPA (host checks) for instance to control ICA/HDX features like drive mapping etc. internally. And you cannot have thin clients on the Internet that connects into the enterprise through NetScaler Gateway!
Next you should read this article that details the PowerShell madness 😉
Configure Desktop Appliance sites
I won’t go into details of the article above but rather show you how it’s done and with some examples of arguments to pass to the PowerShell scripts.
Step one is to log on to your StoreFront server, and just to show you our current setup is that we have one Receiver for Web (RfW) sites used for browser access into StoreFront:

From a Store perspective you can see that we have one (1) store that the RfW site exposes:

So what we now want to do is to expose this Store to a thin client that starts up in a “Appliance mode” that most vendors name it, I’ve tested it with an Igel Linux thin client that happens to be a favourite of mine. The goal is that this client just starts up and directly just shows the login page of StoreFront Desktop Appliance site, then after the user is authenticated his/her XenDesktop desktop launches. For this specific purpose it’s important to note that if you configure your thin client to connect in appliance mode to a StoreFront Desktop Appliance site only published desktops will be shown. You don’t get the option to launch applications, and if the user that logs on has multiple desktops you can control if the first one in the list should be launched automatically or not by configuring this:
To get back on track *again*… open up PowerShell as an admin:

Now we need to import the StoreFront module by issuing this command:

NOW CLOSE THE STOREFRONT CONSOLE!
Important: In multiple server deployments, use only one server at a time to make changes to the configuration of the server group. Ensure that the Citrix StoreFront management console is not running on any of the other servers in the deployment. Once complete, propagate your configuration changes to the server group so that the other servers in the deployment are updated.
Then we go and figure out which command to issue based on the following details from the Citrix edocs article:
Install-DSDesktopAppliance -FriendlyName sitename -SiteId iisid
  -VirtualPath sitepath -HostBaseUrl baseurl -UseHttps {$False | $True}
  -StoreUrl storeaddress [-EnableMultiDesktop {$False | $True}]
  [-EnableExplicit {$True | $False}] [-EnableSmartCard {$False | $True}]
  [-EnableEmbeddedSmartCardSSO {$False | $True}]
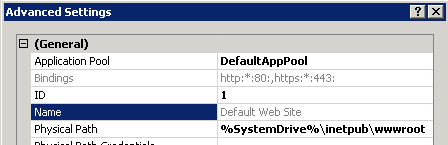
First let’s check which IIS site ID we have in the IIS manager console by going into advanced settings on the site, we use ID 1:
I like to establish a new Desktop Appliance site with the name of “EnvokeITAppliance”, and I don’t want to use SmartCards etc.
The store address is then the path to the StoreFront Store that is aggregating all the XenDesktop/XenApp farms that we have, and this path is simple to see if you have a look in the StoreFront console or in the IIS manager:

In our scenario it will then be: https://storefront.envokeit.local/Citrix/EnvokeITAppStore
So this would then be the command that I’ll run:
Install-DSDesktopAppliance -FriendlyName EnvokeITAppliance -SiteId 1
  -VirtualPath /Citrix/EnvokeITAppliance -HostBaseUrl https://storefront.envokeit.local -UseHttps $True
  -StoreUrl https://storefront.envokeit.local/Citrix/EnvokeITAppStore
When you fire away you’ll see the progress of the installation of the site as shown by the picture below:

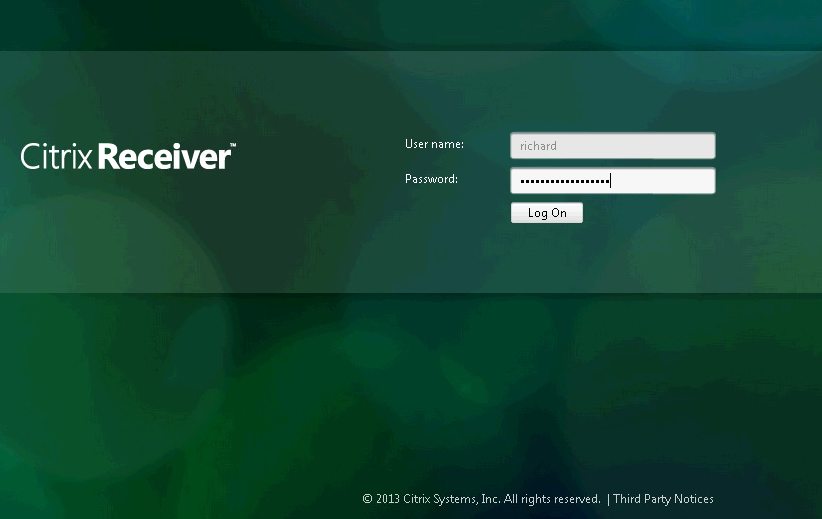
Now we’re ready to verify the functionality of the store! Let’s browse to it, login and see what happens! I open a browser and enter: https://storefront.envokeit.local/Citrix/EnvokeITAppStore to get to the standard login page where I enter my username and password and then I’m directed to the Desktop layout of the appliance site, and remember that if you only have one Desktop published we’ll fire it off and then log off from the web UI and the published desktop is the only session running. This is especially good for kiosk thin clients where the end-user may remember to disconnect or logoff his/her XenDesktop session but may not remember to logoff from the StoreFront Receiver for Web (RfW) site if he/she walked away, this is now automated so when the session gets disconnected or logged off then you are taken back to the login page.
Directly after I’m authenticated you can see that the desktop is initiated and launched:

Once you then logoff from the session you are taken back to the login page:

So that’s how “easy” it is to configure a StoreFront Desktop Appliance site, however I’d rather do this configuration from the console.
There are also a number of different StoreFront related configurations that you need to do in order to speed it up and having it work perfectly, examples that myseld and others have covered in earlier blog posts:
Performance Tuning Citrix Storefront 2.x (by my colleague Peter Smali)
And also ensure that you intelligently load balance your XML brokers, my suggestion is to use content switching in combination with load balancing to get a more optimal solution in place.
Ensure that you DON’T use FQDN’s when you add the XML broker name into the Delivery Controllers config of the StoreFront Store!! Use NetBIOS names, and NOT like farm1.company.com, rather specify “farm1” and then ensure that the StoreFront server can resolve “farm1” to your CS VIP, that will speed enumeration up a lot due to that StoreFront first checks via NetBIOS/WINS which isn’t that optimal!
Content Switching instead of Load balancing of XenApp XML brokers? – #XenApp #NetScaler #CS #LB
Happy StoreFront’ing!
//Richard
Leave a comment


Great Post Richard 😉 As Usual
Excellent post, Added to my favorites – I have to link
it to my friends